
HDR in underwater photography
So what is HDR and why should it be interesting for UW photography?
Let us start with the first part of that question. HDR stands for “High Dynamic Range” photography, but for many people it also means a certain image style, an issue we will come to shortly. Just to keep our ideas together, the “dynamic range” in this case is the exposure range from the darkest shadow zones to the brightest highlights of the image. Usually this is expressed as a ratio of the brightest highlight to darkest shadow; daylight scenes can have a full range of 100 000:1 and the eye can handle 10 000:1 in single views. Photographers often think of this differently. Exposure values, measured in IL (or EV) units, double in brightness with each step. So we can think of the dynamic range as the number of such steps that we can record in an image. As an example, taking a photo with a JPEG image format will give you an 8 step dynamic range (8 IL) from black to white, called an LDR (low dynamic range) image (expressed as a ratio this would be only 256:1). Most of us prefer using RAW format, because the dynamic range is increased to 12 steps (12 IL, or a ratio of 4096:1). Keep in mind that the real dynamic range is reduced because of noise. Since today’s computer screens only allow an 8 IL dynamic range, and print papers are worse, many beginners ask, “Why bother with RAW?” The answer lies in post-processing requirements; if you perform any corrections on color balance or exposure on a JPEG image you will lose information. Working on RAW images gives more latitude for corrections. HDR goes beyond RAW, usually combing three images taken at different exposures (bracketing for example: +2 IL, 0 IL, and -2 IL), to produce a single 32-bit image with a 16 step dynamic range (65 536:1). If HDR only meant that, it would not be so interesting in UW photography.
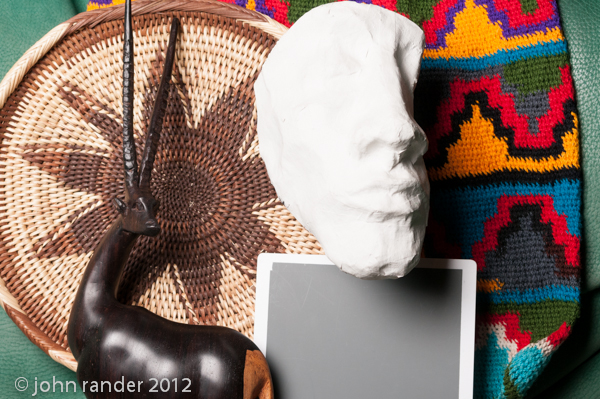
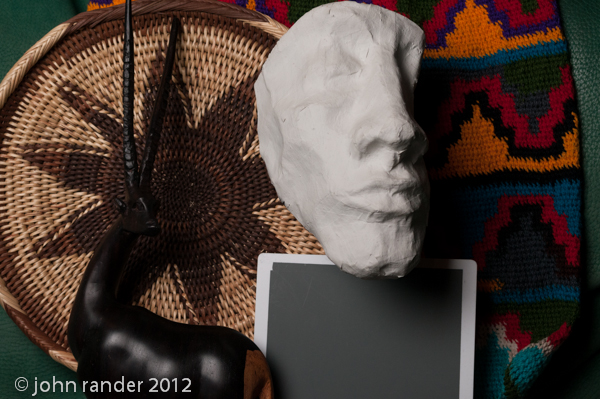
This sample image illustrates the conventional
HDR method:A series of photos are taken in RAW format at fixed aperture (constant depth of field) but different exposures (top to bottom at left, bracketing: +2 IL, 0 IL and -2 IL) in this case flash settings, but usually exposure times. The final HDR tone mapped image (above) shows more detail in the highlights than the roll-over image taken at the central value in JPEG (but watch out for white highlights turning gray).
HDR tone mapping is the issue
The major improvement in HDR digital photography is tone mapping. Fine, so what is tone mapping? As mentioned above, the images we see/share on computer screens, books or magazines have a limited dynamic range. The key is how one goes from a very deep HDR image to the final LDR image on the web. The recipe for this “translation” is called “tone mapping”, because it tells how colors in one image space are mapped in to another space. Obviously there can be many different ways of doing this. If you are having trouble at this point, think about making a B&W photo from a color image. There are different ways in which you might translate red or green into shades of gray (film photographers used different colored filters to provide various “translations”). Coming back to the dynamic range issue, previously, the main options available before HDR were either to shift the range, thereby clipping highlights or shadows, or to flatten the contrast in order to fit the full range into LDR. What is really new to HDR image processing is that tone mapping can use local information within the photo (like as if you were manually correcting zones in the photo with masks). Local tone mapping is important because we can increase contrasts to bring out details in highlights or shadows that would be crushed by global exposure changes.
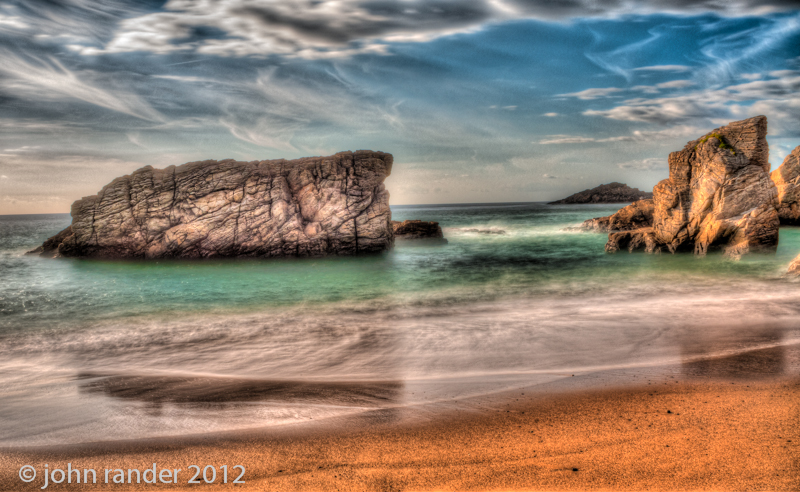
Sea coast pseudo-HDR image taken in RAW and tone mapped from three TIFF copies (long exposure time gave soft sea and clouds). The roll-over image shows the original version of the same scene (as it would have appeared in JPEG). The quality of the final image would be even better if taken as a true HDR (based on a 3 image series in RAW).
Certain recipes for tone mapping lead to surrealistic results; the resulting “grunge-look” image style is often associated with HDR photography. Such an over simplification may keep you from using a powerful tool.
So called "HDR-style" image produced by pushing the tone mapping parameters to more surreal values. This interpretation in one of many that can be obtained with the same post-processing software.
How does this work UW?
Obviously, the three bracketed image option is of limited use in our fluid submarine world. What is possible, however, is to take a single RAW image (do not bother with JPEG for this); keep in mind that you can reduce noise in the shadow regions by shooting your original RAW image slightly over-exposed ("expose right" guideline). Then produce three copies of this image in post-processing with artificially bracketed exposure settings (watch out for highlight clipping); the best results with current HDR software are obtained with three 16-bit TIFF images. It is a good idea to correct the RAW image for chromatic aberration, but do not sharpen or make exposure modifications on the input TIFF copies. Processing these images in a program such as HDRsoft PHOTOMATIX PRO will produce a 32-bit intermediate HDR image. The software provides a full range of tone mapping options which allow you to “translate” this to your final image.
Incidentally, Photomatix does allow you to tone map a single RAW image directly; personally I do not obtain the best results this way and I expect that the Adobe RAW converter in Lightroom 4 does a better job with noise and highlight clipping than Photomatix.
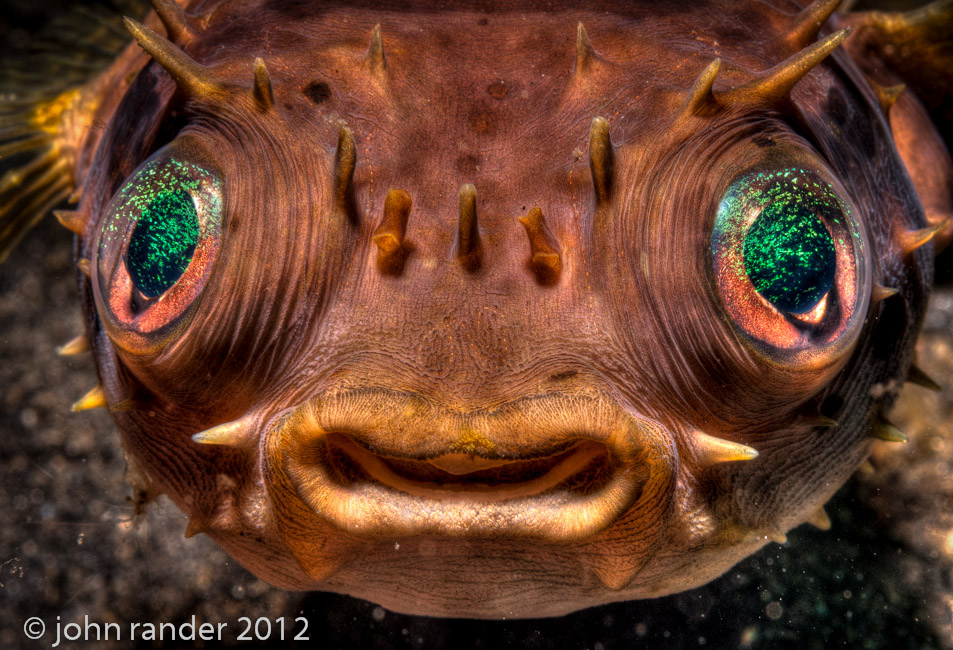
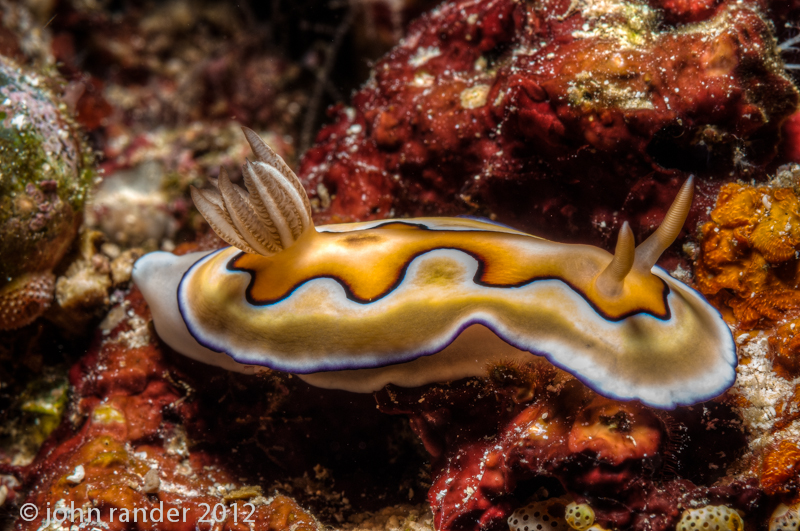
Sea slug photo taken in RAW, converted into three TIFF images in Adobe Lightroom 4 and post-post processed in Photomatix Pro to produce a tone mapped version, revealing considerable details. The roll-over image shows a simple tone compressed version for comparison. Note that special care is needed to avoid turning white zones into gray.
What is the catch behind using a single RAW image?
In creating a "pseudo-HDR" image (12 IL dynamic range), instead of a real HDR image (16 IL dynamic range), you are increasing the noise in the image. This aspect will need careful attention in the post-processing. You may also encounter some highlight clipping when working with flash photos. Overall there is a slight loss in qualtity with respect to a real HDR image, but the results are nevertheless satisfying, as you can remark from my images.
Are there other issues to consider?
Yes, several points. First, take care not to make white zones too grayish. Second, be aware of that tone mapping can produce halos and other artifacts which need to be kept under control. Finally, increasing details can bring out a lot of backscatter of the flash off of particles in suspension normally hidden in the shadow areas of the photo. Sometimes you can fix this afterwards. This brings up an important point; when you have finished tone mapping your photo, you will often find it useful to do some additional corrections in Photoshop or Lightroom. This additional work is best done on at least a 16-bit (or even 32-bit) TIFF copy before settling down to the final JPEG.
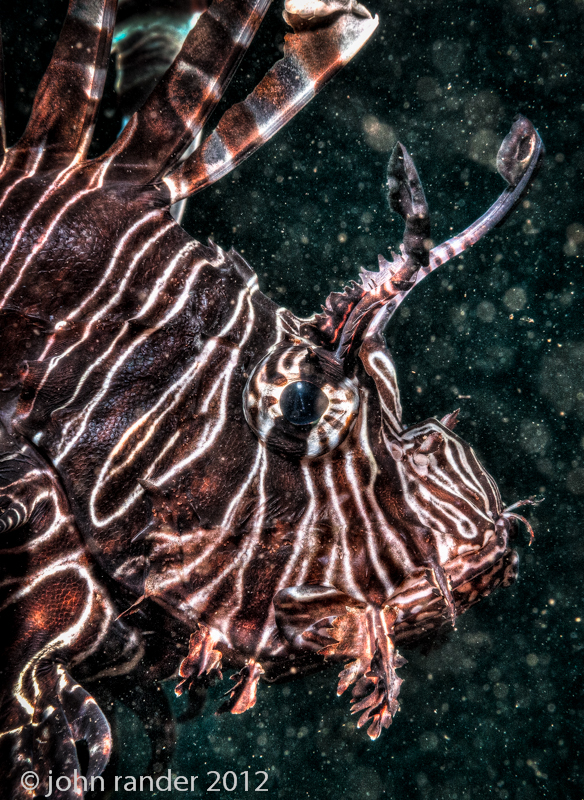
Tone mapped RAW image revealing interesting detail in the lionfish, but also producing a very noisy background from the large amount of sediment in suspension. Some additional retouching of the image (such as background masking in this example) can be performed on the HDR version in TIFF format before producing the final JPEG image.
Can tone mapping help in coral fluorescence photography?
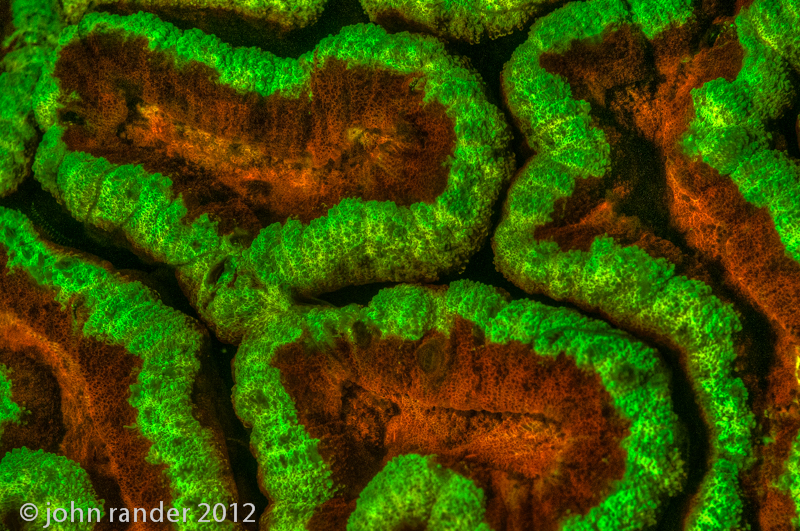
One of the aspects of coral fluorescence (photos shot while night diving) is the very strong signal from Green Fluorescent Protein (GFP) which dominates other colors. I find that careful tone mapping can reveal more details and subtle tones in these images in the same way it improves details in normal photos. Again noise is a critical issue. (Information about how fluorescence images are taken can be found on my page Photographing coral fluorescence underwater).
Trumpet coral (Caulastria echinulata) fluorescence; close-up taken at Makawide 2 - Lembeh Strait.
Conclusions
Looking for more details in highlights or shadows in UW photos? Try HDR post-processing of your RAW images. Not all photos can benefit from this, but you may be surprised with the result. I have tried both Adobe Photoshop HDR Pro and HDRsoft Photomatix Pro. Personally, I find that Photomatix easier to use and more efficient in obtaining results which I like. Incidentally, you can download a free Trial version of the software to test it on your photos (unlimited use, but it places watermarks on each image until you have bought the license).
There is no “single solution” in tone mapping; there are a large number of parameters, as well as several distinct methods, and each photo will require a “personalized” treatment. You might try making up several versions of an image before deciding which version to fine-tune. Keep in mind that using degraded filters in film photography, and following that up with handmade masks while printing big enlargements was also very “personalized”. Avoid stereotypes and you’ll be fine.
See more examples of HDR tone mapping in underwater photos:
Images from
N. Sulawesi
tone mapped using
Photomatix ProClick on the image to enter
the HDR gallery
HDR Images
N. Sulawesi
Top of the page


© John Rander, all rights reserved.